
Use Mapview to Add Contacts to your Sales Route
It’s happened to all of us. We show up for a client appointment to find out that they are suddenly not available to meet with us. Do you kill the next hour in the closest coffee shop or react productively to the change?
The choice is yours, but we’d suggest the latter! With a mapping application downloaded on your device, like Sales Navigator, reacting to changes in your schedule becomes a seamless experience.
If you are already a Sales Navigator user, I’m sure you have tapped on “List by Name” to view your contact list, but have you checked out the other list viewing options? We find that they help users narrow down their contact list and discover nearby opportunities.
There are four different types of contact list views: All, Filtered, Mapview and Circle. Each helps you to organize and access specific information. This blog will focus on Mapview, but below is a quick rundown on the other views:
All: ‘All’ view displays all contacts imported into Sales Navigator in a list view. Search the list view to access specific information quickly.
Filtered: ‘Filtered’ displays contacts that meet the filtering criteria set in the Filters menu. For example, if you have all groups turned off except ‘Rating = Hot’, you would only see contacts from that group listed in the ‘Filtered’ menu.
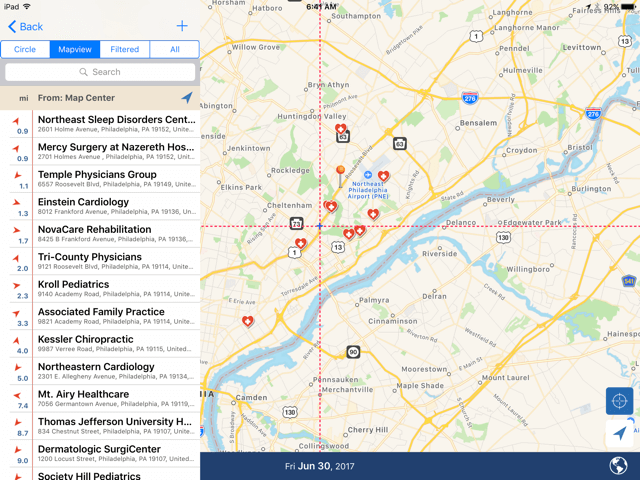
Circle: Circle view displays all contacts within a radius by distance and direction from the circle center. Set the circle radius by pinching and zooming the map.
Tips on using Mapview
Whether you are reacting to a schedule change or planning your day, mapview helps you to efficiently see which contacts are in the vicinity of the center point you choose, so you can easily add them to your route.
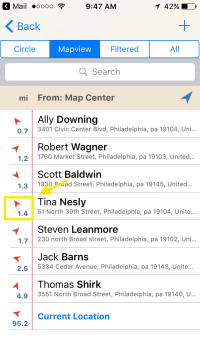
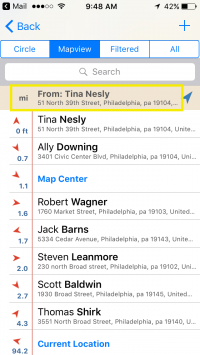
Setting a center point
You have two easy ways to set a center point using mapview. You can either drag the map to place the center designation where you wish or you can select any of the contacts in your mapview list to be situated as the map center location.
To select a contact, tap on the red directional arrow to the left of the contact name. Once you do, you will see that your contact list is re-ordered to represent each contact’s distance and direction from the new map center.
If using an iPhone, you can jump back and forth between your list and the map. When displaying your mapview list, simply swipe to the left to view the map. To return to your list tap the menu icon in the bottom left corner.
Getting directions
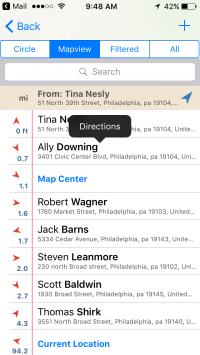
Get directions between the set map center and any other contact in the list by tapping and holding the contact in the list view. A “Directions” pop up will appear and when tapped it will export the two addresses to the mapping application of your choice.
You can select Google Maps, Waze, or Apple Maps as your turn-by-turn navigation selection in the map settings by tapping the Earth icon in the lower right corner. As long as you have the corresponding mapping app downloaded on your device it will appear as a choice for you.
Prior to using Sales Navigator, I did not have the luxury of having all my contact information at my fingertips and I definitely would “wing it” when trying to find somewhere to visit in the case of a cancellation.
That’s no longer the case, as I can easily see which clients and prospects are nearby my location to make the best use of my sales day. We hope using mapview helps to make you more productive, too!
Ready to get started?
Try Sales Navigator for free on the iTunes App Store. Looking to purchase Sales Navigator for a large sales team or curious about a CRM integrated version? Request a demo to learn how Sales Navigator can help your team.