Sales Navigator for Salesforce app settings allow you to set custom defaults for trips, choose the language from over 16 languages and more. In this post, learn how to access the app and map settings to set your preferences for a better workflow.
App Settings Overview
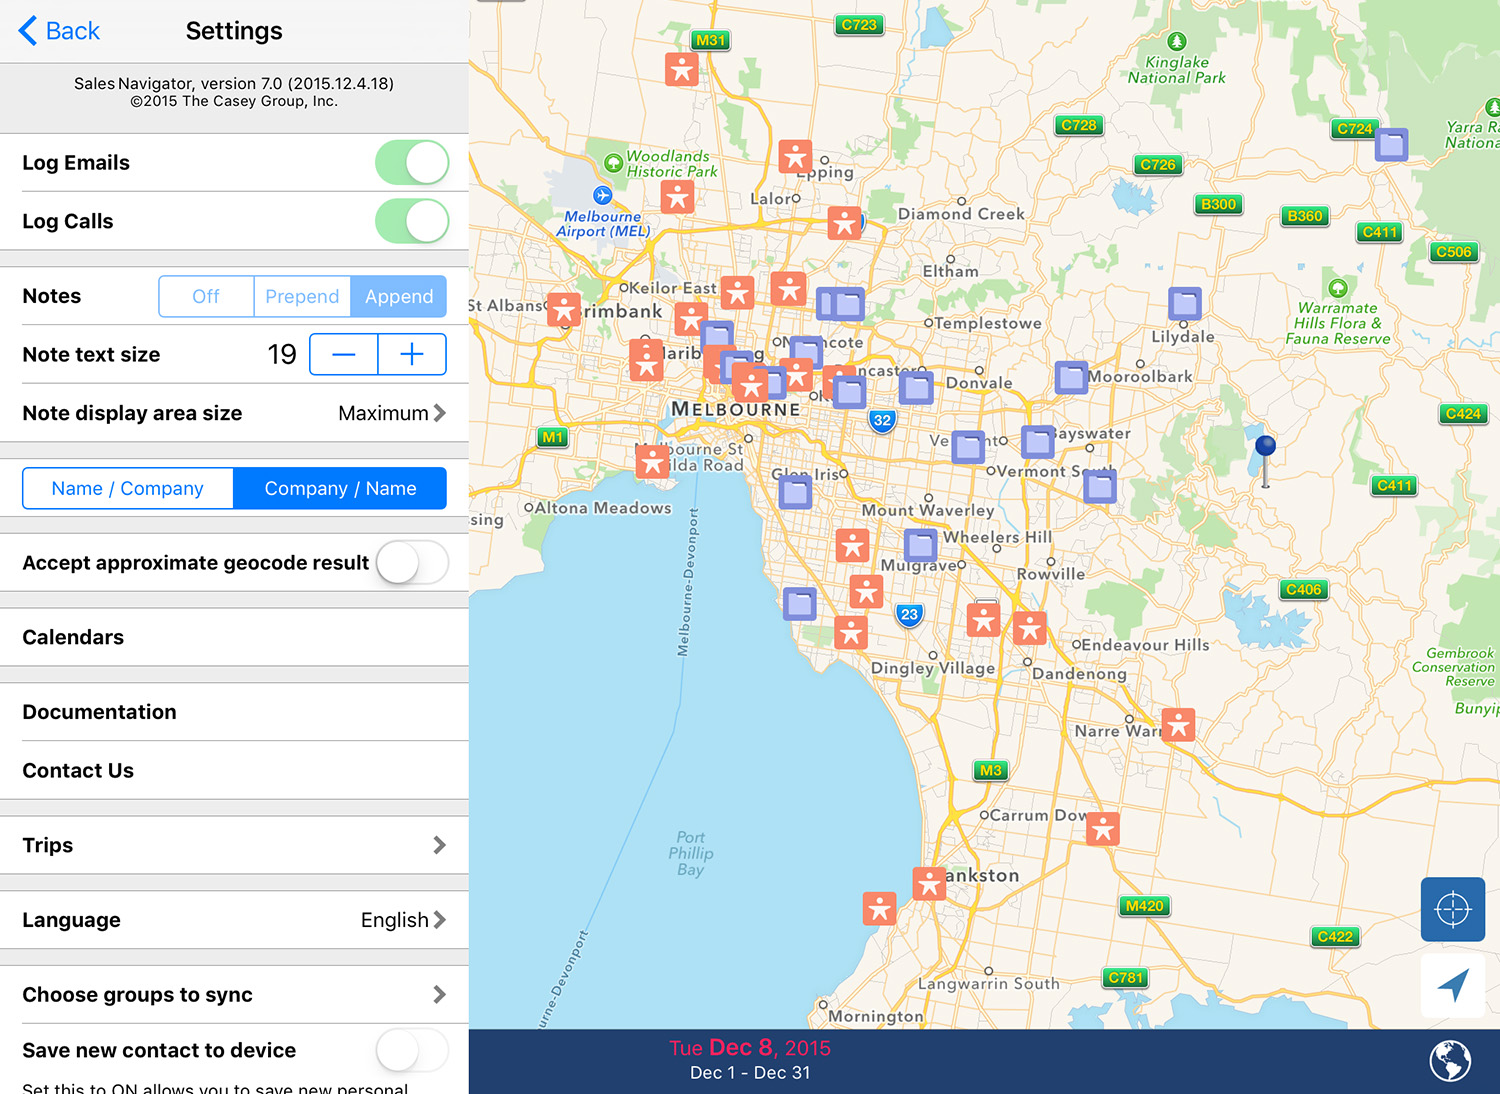
To access the app settings, start by opening the menu by tapping the menu bar icon and choosing settings.
Log Emails/ Log Calls/ Log Notes: these settings are usually managed by your Salesforce admin and you will not be able to edit them. If you do have permission, you can choose to log notes, calls and emails in Salesforce.
Note Text Size: edit the text size of your notes in the contact details area. (for personal contacts only)
Note Display Area Size: edit the text size of the contact detail area. (for personal contacts only)
Name/Company or Company/Name: choose to display the contact name or company name primarily when you tap on a pin. (This can also be for account, opportunities etc).
Accept Approximate Geocode Results: if your data is showing up in Sales Navigator but not displaying on the map, you can turn on accept approximate geocode results to map your data again with less strict standards. For example, if your data is incomplete, such as missing a postal code.
Calendars: Here you can choose from calendars that are synced to your device to view in Sales Navigator for Salesforce. By default all calendars are set to on.
Documentation: tap documentation to access our support pages.
Contact Us: tap contact us to send our support team an email in app.
Trips: set your default trip settings to easily set start/end locations and time to your trips. Also, set default meeting time for more accurate optimization and choose on-time and late route colors.
Language: choose from over 16 different languages.
Choose groups to sync: choose groups from your device address book to sync with Sales Navigator for Salesforce.
Save new contact to device: if you add a new contact in Sales Navigator you can choose whether it syncs to your device address book.
Map Settings Overview
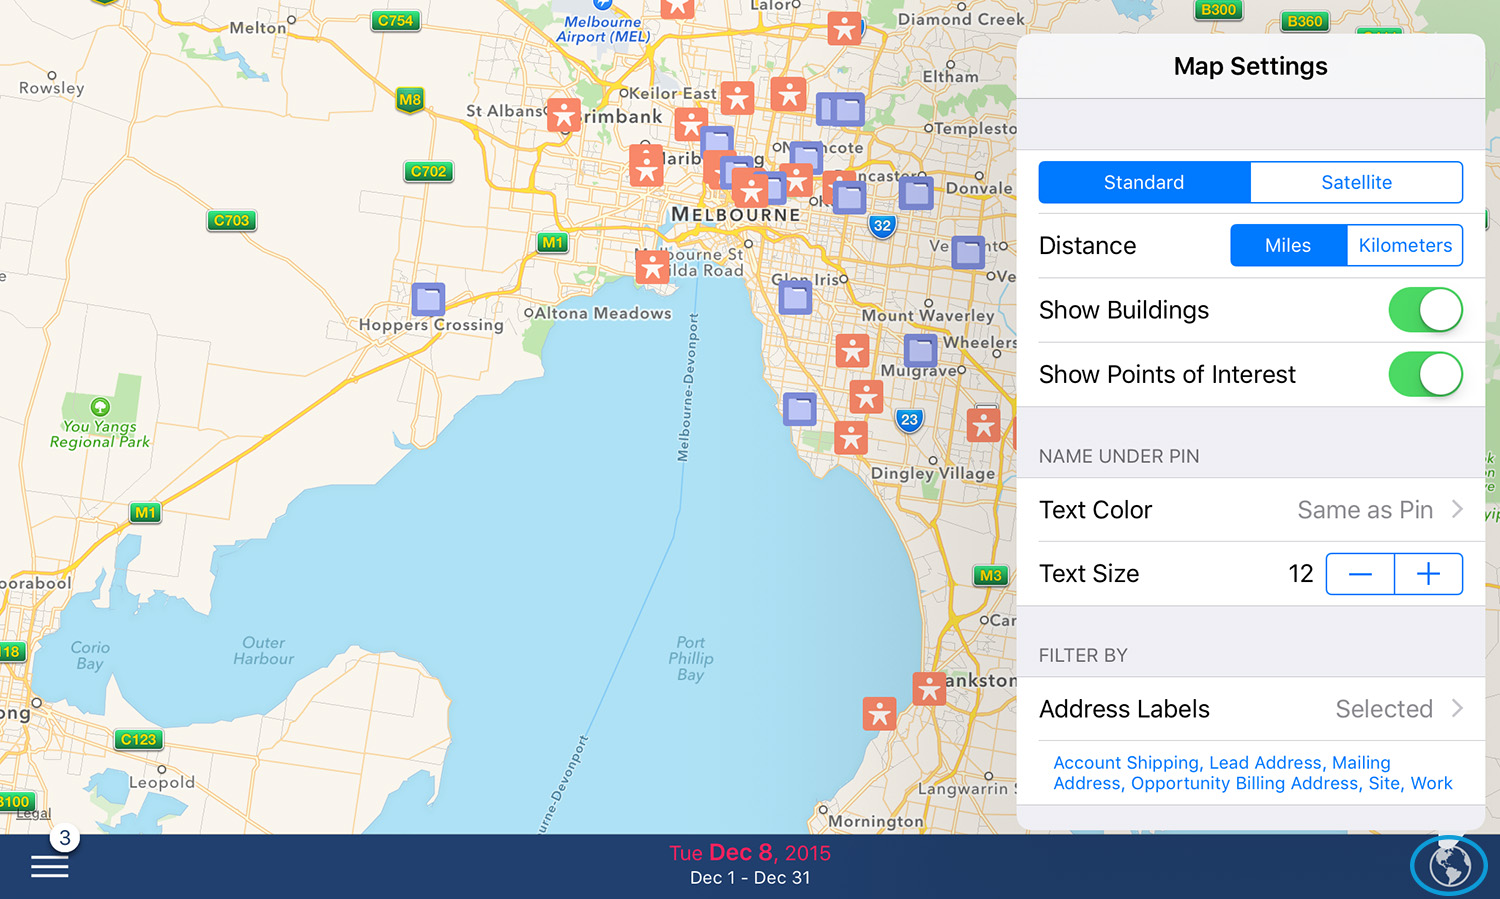
To access the map settings you can tap the earth icon in the bottom right hand corner of the menu bar ( ![]() ).
).
Standard/Satellite: Toggle between standard and satellite view of the map
Distance: Choose between working with miles and kilometers.
Show Buildings: When in 3D mode, choose to see the buildings to help you navigate the area.
Show Points of Interest: Toggle points of interest on/off to show/hide them on the map.
Text Color: When you zoom in far enough, the name of the contact shows under the pin. Here you can set the color of the text.
Text Size: Similar as text color only you are choosing the size of the font.
Address Labels: Show addresses with a specific type of label on the map, such as shipping or billing.
Thank you for using Sales Navigator for Salesforce. Please contact us if you have any further questions or feedback.


